Perform the following steps for adding an Azure tenant application to Britive:
Note
Before onboarding the application, ensure that you have completed the onboarding prerequisites mentioned in the section Prerequisites for Azure Onboarding.
Log in to the Britive application with administrator privileges.
Click System admin > Tenant Applications.
From the Tenant Applications page, click Create Application.
On the Add Application page, click the Add (+) sign next to the Azure application. The Create Application page is displayed. On this page, you can see two tabs—Application and Settings.
In the Application tab, enter the following values:
Enter the Application Name.
Enter the Application Description (optional step).
Under Account Mapping, you can choose the username or email mapping to map the username or user email with the Azure account, respectively. You can also choose the default setting "No mapping", as per your requirement.
Click Next. The Settings tab is displayed.
In the Settings tab, enter the following values:
Credential Type: The Credential Type can be Console Access or Programmatic Access. Console Access is the access given by Britive to a user for a particular user account. In Programmatic access, Britive generates a service account and gives permissions to that service account. You can choose either Console Access, Programmatic Access, or both. By default, Console Access is checked. If you want to use Programmatic Access, select the check box near it. The following list explains the functionality available when you select either of these options.
Console - If you want to access Azure from the Azure web portal (https://portal.azure.com/), then you need to configure this option. When you have selected this option, once you have onboarded the Azure application, an Open Console button will be visible inline to the onboarded Azure application on the My Access page of Britive. Note that this Open Console button is available on the My Access page only after onboarding the Azure application and only if you have mapped the corresponding application account in the Britive user account. The Open Console button lets you directly access Britive by logging in through the Britive web portal.
Note:
To use Console Access successfully, the user account needs to have a valid account mapping.
If you have not mapped the corresponding application account in the Britive user profile, the Console Access will not be available on the My Access page.
Programmatic Access- If you want to use Azure from Britive CLI or use a script, then you need to enable this option (programmatic access). When programmatic access is enabled, during the profile checkout in Britive, a service principal is created in Azure, and the permissions are granted to that specific service principal.
Note:
Programmatic Access is mostly used by developers who want to use scripts or who want to check out profiles using Britive CLI. While using Britive CLI, only Azure user profiles that have Programmatic Access enabled are displayed when you use the list profiles CLI command.
When you have enabled Programmatic Access for the Azure tenant application, from the My Access page of the Britive web portal, you can click the Open Programmatic Access option and directly view the credentials.
Check the Display programmatic access keys to allow the user to copy the credentials to the clipboard after they check out programmatic access profiles. Users can only access the keys through CLI or scripts if the option is not selected.
Connection Properties
Tenant ID- The ID of the Azure tenant application.
Client ID- The ID of the Client application.
Client Secret- The value of the Client Secret.
Login URL- The login URL. The default login URL is https://portal.azure.com/, but you can also provide a custom URL if required.
Note:
The above properties were configured as part of the Prerequisites.
Scan Method: The filters are used to create a subset of users or groups. Filters are used to filter only those specific users in Microsoft Entra ID who use Britive for cloud access. Filters can be used for users or groups in Azure. Britive uses Microsoft Azure APIs to collect the data from the Microsoft Entra ID. Britive supports using $filter and $search parameters for defining the filters. For more information about Microsoft Azure API documentation on how to use these parameters for collecting the directory objects, see the following: filter parameter and search parameter. Azure application needs an additional permission (AuditLog.Read.All) to collect the user's last sign-in date. See Assigning Directory and Audit Permissions for Discovery and Visibility to grant this required additional permission. Britive skips collecting the user's last sign-in date in the absence of this permission. Britive uses the latest date value out of lastSignInDateTime and lastNonInteractiveSignInDateTimevalues returned by Azure.
Collect all users and groups and optionally provide a filter- If you select this option without checking the sub-options (Filter for users and Filter for groups), then Britive collects all users and groups in Azure, who use Britive for their cloud access. The filters that you configure here are validated when you use the Save and Test button in Step 8.
Filter for users- If you select this option, then Britive collects Azure users based on the filter provided. You can use the different filter types to filter the results. For example, if you select the $filter=startsWith(userPrincipalName, 'John'), then Britive collects all the Azure users whose userPrincipalName starts with 'John'.
Filter for groups- If you select this option, then Britive collects Azure groups based on the filter provided. You can use the different filter types to filter the results. For example, if you select the filter $filter=startsWith(displayName, 'Sales'), then Britive collects all the Azure groups that start with the Display Name 'Sales'.
Collect groups based on a filter and all users who are part of those groups -This is a filter for groups.
Filter for groups- When you select a filter in this option, for example, $filter=startsWith(displayName, 'Engineering'), then Britive collects all the Azure groups that start with Display Name 'Engineering' and the users that are part of those groups. The last sign-in date of the user is not collected in this case.
Collect users based on a filter and all group memberships of the users
Filter for users—When you select a filter in this option, for example, $filter=startsWith(userPrincipalName, 'Mike'), then Britive collects all the Azure users whose user-principal Name 'Mike' and the groups that they are part of.
Advanced Settings: The Azure application only collects Microsoft Entra ID users, groups, and roles. To collect Azure management groups, subscriptions, resource groups, and resources, select one of the following options:
Scan Management Groups and Subscriptions—This option collects all the management groups and subscriptions in the Azure tenant.
Scan Subscriptions Only—This option only collects the subscriptions that the service principal used in Britive to connect to the Azure tenant has access to.
Scan Azure Resource Groups and Resources—This option collects all the resource groups and resources belonging to subscriptions. It can only be selected if either #1 or #2 is selected.
Scan Azure Service Principals—Scans service principals in Azure.
Scan user group memberships—Scan user group memberships. This applies only to the first option (Collect all users and groups and optionally provide a filter) under the Scan Method. Group memberships are collected for the other scan methods.
Note:
Unchecking this option deletes all the group membership data from the appliation in Britive and the scan summary shows them as removed.
Profile Settings: Configure the maximum session duration for profiles. You can select the duration between 15 minutes to 7 calendar days. This allows to setup expiration duration for each profile while creating/updating the profile up to this configured value. If existing profiles are created with more than 12 hours and the above setting is changed, then it cannot be lowered until all profiles are updated with a lower expiration duration.
8. Click Save and Test. If the Azure application is configured with the correct values, then the success message is displayed.
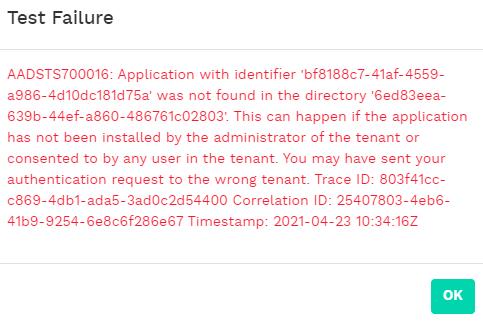
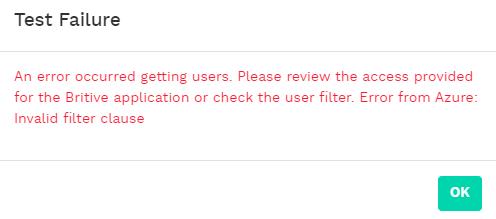
Possible Error Messages
The following error messages are displayed in case of incorrect configurations.
Invalid filter values can provide the following error message.
Providing incorrect credential values during onboarding configuration can result in the following error message.